Staff: H. Nakao (PHS:4868)
*Notes
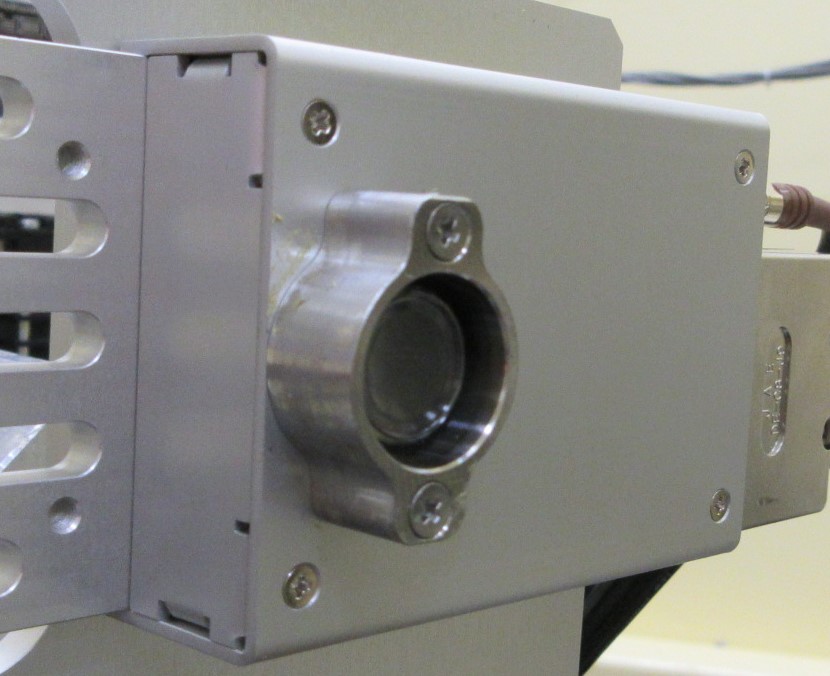
At BL-3A and BL-4C, the silicon drift type X-ray detector
has been replaced with a new one.
The thickness in the optical axis direction is short,
making it easy to install, but the Be window on the light receiving surface is close,
so there is a high possibility of breaking it by touching it with your hands.
Therefore, please be sure to wear the pink cover as shown in the photo when not in use.

This is what it looks like when the cover is removed.
Also, be careful when using the power supply box.
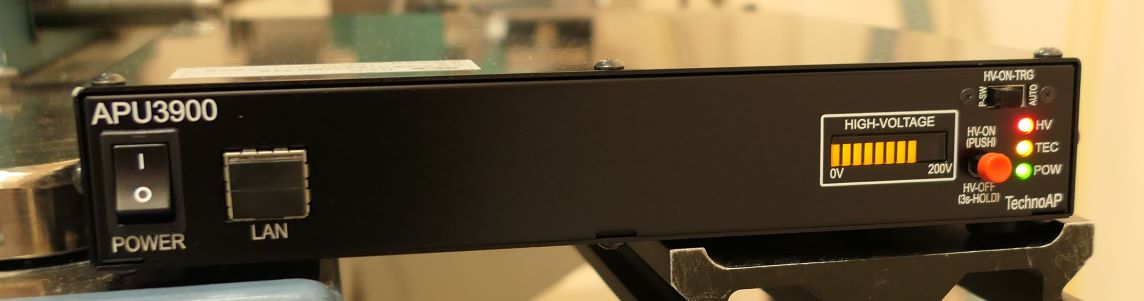
Normally you would leave the power on, but when you turn on the power,
first turn on the "POWER" switch. After waiting a while, the POW and TEC button lights
on the right side will turn on.
Next, gently press the red protruding button and the HIGH-VOLTAGE lamp will light up as shown in the photo.
(This button seems to be easily damaged)
To turn off the power, do the reverse procedure: press the red protruding button to reduce HIGH-VOLTAGE,
and then turn off the main power with the "POWER" switch.
Note that the signal analysis part is the same as before, so you can use it as before.
(Of course, the configuration file is new.)
Currently, it is working well, so please be gentle with it.
We use a virtual PC (VirtualBox), Nomachine
for remote control, and NextCloud for data sharing.
First, when you start up or restart the main unit (Surface),
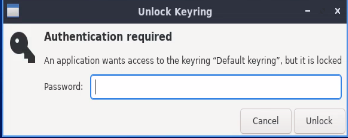 this will be displayed.
Please enter our usual password.
(Required to update your own experiment results on the NextCloud server from time to time)
The virtual PC used for the experiment will automatically start up as shown below.
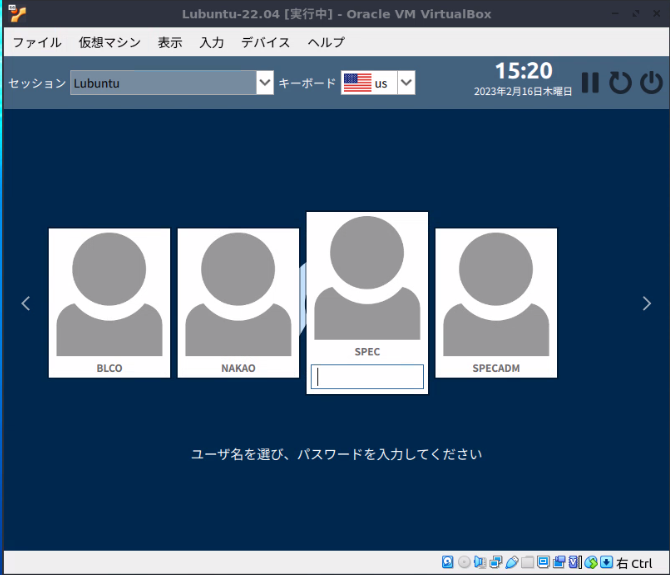
After that, you can use it as before.
〇 Preparation for the experiment
・ Login to the virtual PC.
If your user ID is not registered or you have forgotten your password,
please contact the person in charge.
・ Open the terminal
Open it with [System Tools-QTerminal] in the bottom left menu .
.
・ Create a directory for the experiment and move to that directory.
$ mkdir 171001
$ cd 171001
・ Start fourc
To start fourc at the start of an experiment,
use the following command unless there is a special reason.
$ fourc -f
(The "-f" option is a forced initialization.)
When a user connected a new device, the settings on the SPEC side change,
causing a discrepancy with the previously used situation and causing problems.
If you need a log file,
$ fourc -f -l 231210.log
Note: l (L) is not 1 (one) or | (pipe).
In addition, if you want to start fourc again during the experiment,
$ fourc
If you start it without the "-f" option, you can restore the settings up to that point.
・To create a data file
FOURC> newfile 231212.dat
In addition to data files, SPEC has various initial settings.
If you are using it for the first time, we recommend running the following command
to get an idea of what can be configured.
FOURC> startup
If you don't know the settings, you can use the default values, so just press Enter.
○Monochromator adjustment
・ Change to the energy you want to use.
Example) Move the energy to 8 keV.
FOURC> moveE 8
To check the current energy.
FOURC> getE
(At BL-3A, the gap of insertion device is controlled at the same time.)
When adjusting the monochromator, remove the SDD detector
and securely fix it to the surrounding stage to prevent the SDD detector from direct beam.
The SDD detector will be broken, when the direct beam inject into the detector.
This is a precision instrument, so please handle with care.
・Open the slits, and remove attenuator.
FOURC> nslit1 10 10; nslit2 10 10; nslit3 10 10; atten 0
・Make sure that th and tth are 0 and chi is 90 (or -90).
FOURC> wh (Check current angle)
If it is off, bring it up to the specified value.
When moving the motor, be careful not to get the cable entangled.
For example, please check the following location.
FOURC> umv th 0
FOURC> umv tth 0
FOURC> umv chi 90
* When chi=0, the rotation axes and directions of phi, tth, and th must match.
If it is different, use the config command to reverse the sign of "Sign of user".
Note 1: Visually check the zero point even in the memory of the diffractometer to be sure.
(In other words, even if wh is displayed as zero, it may not actually be zero.)
Note 2: If the position of each axis is different from the angle you expected, change it using the set command.
Note 3: Cannot be moved to 0° due to limit settings. Please refer to the
manual (Moter setting).
・SDD detector is very delicate. Please handle with care.
In particular, be careful not to let the direct beam enter the SDD
when opening the shutter!
Remove the SDD detector, when inserting X-rays with tth=0 due to base adjustment, etc.,
and securely fix it to the surrounding stage. (If you fall it, you'll be in trouble.)
・Open the shutter and confirm that X-rays are coming to the ion chamber IC0 (pa0).
FOURC> ct
(A signal of 10-7 to 10-8 units comes at pa0. (The value depends on the beamline and energy.)
Also, if the value of the ion chamber is strange, use the following "autorange0" command. I'll be back.
・Fine adjustment of the monochromator.
FOURC> autorange0 1 (Set IC0 gain to automatic)
FOURC> plotselect pa0
FOURC> DET=pa0
[Means that the plot data is set to "pa0" and the measured data is set to "pa0" (for cplot).]
FOURC> chk_thresh = -1
FOURC> dscan DTH -0.02 0.02 30 0.1
:
FOURC> umv DTH CEN
○Base adjustment
Confirm that X-rays are entering the downstream ion chamber IC1 (pa1 [i1]), and change plotselect to plot "pa1".
FOURC> autorange1 1
FOURC> plotselect pa1
FOURC> DET=pa1
Attach the adjustment plate and pinhole to the diffractometer.
(BL-4C: Stored downstream in a cupboard. BL-3A: Stored in a shelf upstream inside the hatch.)
First, insert only one pinhole and adjust the z and y axis directions.
(Choose a pinhole size that is just right for the beam to enter IC1.
If there is nothing in particular, 0.5mmφ will pass, but...)
Scan each and move it to the center of the half width.
( The mount adjustment command is different for BL-3A. )
[BL-4C]
FOURC> scan_st z -2 2 30 0.1
:
FOURC> mvr_st z CEN
FOURC> scan_st y -2 2 30 0.1
:
FOURC> mvr_st y CEN
[BL-3A]
FOURC> dscan z -1 1 30 0.1
:
FOURC> umv z CEN
FOURC> dscan y -1 1 30 0.1
:
FOURC> umv y CEN
*Be sure to record the FWHM value in the log notebook after scanning y and z
with a 0.5mmφ pinehole (BL-4C) [0.3mmφ(BL-3A)].
Then use the double pinholes to adjust z, y, rz, and ry.
z and ry, y and rz are linked, respectively.
If the beam position is significantly off, convergence to the optimal value will be faster,
if you scan the linked axes alternately until convergence.
[BL-4C]
FOURC> scan_st ry -2 2 30 0.1
:
FOURC> mvr_st ry CEN
FOURC> scan_st z -2 2 30 0.1
:
FOURC> mvr_st z CEN
FOURC> scan_st rz -2 2 30 0.1
:
FOURC> mvr_st rz CEN
FOURC> scan_st y -2 2 30 0.1
:
FOURC> mvr_st y CEN
[BL-3A]
FOURC> dscan ry -0.4 0.4 30 0.1
:
FOURC> umv ry CEN
FOURC> dscan z -1 1 30 0.1
:
FOURC> umv z CEN
FOURC> dscan rz -0.3 0.3 30 0.1
:
FOURC> umv rz CEN
FOURC> dscan y -1 1 30 0.1
:
FOURC> umv y CEN
Finally, make adjustments using a 0.5mmφ double pinhole (BL-4C) [0.3mmφ- 1.0mmφ pinhole (BL-3A)].
○Slit adjustment
・Slit adjustment is automated.
Please enter the command below. Adjustment takes about 30 minutes.
FOURC> slit1; slit2
Note: Even if there is a slit downstream of ion chamber IC1,
it cannot be adjusted.
Conversely, slit adjustment is possible by installing slit 3 upstream of IC1. (slit3)
Set slit1 to the size used for the experiment. (For example, [nslit1 1 1])
FOURC> autorange0 0 (Turn off the automatic gain mode of the ion chamber)
During the experiment, the monitor count will be used for normalization,
so do not forget to turn off the automatic gain mode.
After the slit adjustment was complete, remove the mount adjustment plate.
○Detector adjustment
BL-4C and BL-3A use a silicon drift type X-ray detector (SDD).
・Preparation for adjustment
For example, set "umv tth 30" so that the X-ray intensity of air scattering enters the detector.
Change plotselect to plot the X-ray detector (det).
FOURC> plotselect det
FOURC> DET=det
・How to use SDD
To set up the detector, use the software called "dsp_mca" on the Windows PC.
Press "start" on the toolbar to start measurement.
If there is a signal, I think the spectrum will be measured.
Press "stop" to stop measurement.
In the case of air scattering, X-rays of the energy used are observed.
(The energy on the horizontal axis depends on the accuracy of the previous setting.
If you are unsure, try changing the energy of the X-ray.
The position of real signal will be changed corresponding to the energy of the incident X-ray.
(However, the fake fluorescent X-rays do not.)
Next, move the vertical dotted line with the mouse to set the X-rays in the energy range to be measured.
First, select the "histgram" tab for ROI settings.
Next, select the cross button at the bottom right of the spectrum,
and you will be able to move the vertical dotted line that specifies the energy to be cut.
Once selected, press "config" on the toolbar to send the settings to the device.
The signal in the area between the lines will now be input to the Counter/Timer and counted.
* If the spectrum is not displayed, right-click on the graph and check "自動スケールX".
・dsp_mca settings
Start the DSP control software "dsp-mca" on the Windows PC to the right of the control PC.
Select "open config" from "File" on the toolbar to open the DSP configuration file ("0.5us_SDD.ini").
Press the "config" button on the toolbar.
○ Rotation centering
・Put up the pin and find the center of rotation of the diffractometer.
○ Now, let's have some fun diffraction/scattering experiments
Click here to check various commands
○ When the experiment is finished
Quit from "fourc"
FOURC> quit
After that, be sure to log out from Linux as well.
○ When you are in trouble
・The screen of the virtual PC is just black and cannot be touched. There is no response.
Restart the virtual PC from the menu [仮想マシン - ACPIシャットダウン] of the virtual PC.
・I started fourc, but the diffractometer cannot be controlled.
Warning message: "Hardware is locked by another user. Using simulation mode."
or "are you already running on this terminal"
Please restart the virtual PC.
・Unable to communicate with temperature controller
Please enter "_LTC_is_on_=1"
・Temperature values are not displayed correctly.
Communication consistency between SPEC and temperature controller may not be maintained
if measurement is interrupted using Ctrl-C, etc.
For example, when asked about the ChA temperature, it responds with the answer to the previous question.
The command to spit out the answers to the accumulated questions is as follows.
FOURC> reset_cryocon
If you have multiple answers,
please enter the above command multiple times.
If there are no more answers, no replies will be displayed.
・When I use "ct" or "getE", strange values are returned (including the previous value)
This is also the same issue as the SPEC and temperature controller issue mentioned above.
Please reset the connection with starssever using the command below.
(In case of "Can't change element "8" of built-in array to a string.", it is also same issue.)
FOURC> reset_stars
However, it may not return even after this. In that case, try the following command.
FOURC> stars_init
(There are reports that it didn't work the first time,
but it worked the second time. Please wait a little while and try multiple times.)
・Measurement does not start even if you try to scan.
If you get "Been waiting ** seconds for beam …", cancel the scan with Ctrl+C and type "chk_thresh=-1".
・Even if you enter "wh", other motor values are displayed instead of th, tth, chi, and phi.
Exit fourc and restart with fourc's initialization option ("-f").
FOURC> quit <- Quit fourc
> fourc -f
In this case, all information such as data files will be initialized,
so you will need to reconfigure them.
・There is no peak at the position calculated by "ca".
The direction of rotation of phi may be reversed.
At this case, if phi-fix mode(setmode:3) is used, the calculation will be correct,
but if a calculation that changes the value of phi is included, the calculation of "ca" will be incorrect.
When chi=0, define the rotation axes and rotation directions of tth, th, and phi to match.
Change the rotation direction of phi using the "config" command.
・Cannot use config command.
FOURC> config
LINES = 38 COLUMNS = 78
The configuration editor requires at least 24 lines and 80 columns.
As mentioned above, we cannot use "config" command.
The reason is that the terminal window size is small and the "24 lines and 80 columns" is the limit.
Please use the mouse to increase the terminal window size before using the "config" command.
・Even though the shutter(MBS-BBS-DSS-S-Shutter) is open, the beam does not come (BL-3A)
Please check the gap value of the undulator.
On the
"PF ring operating status" web page or display in the hall, the value of "ID Status"
and ID03 on the right side is the gap value. If the gap value is 43mm, the undulator gap is open,
so it is necessary to close the gap in order to use the beam.
When you moveE to the energy to be measured, the gap will automatically close to the appropriate value.
FOURC> moveE 8 <- When measuring at 8 keV
Note: If the current energy value and target value are the same on the fourc,
"moveE" will not change the gap.
Move to an energy that is slightly different from the current value,
and then move to the target value again.
(Such problem will be happened in case of "Beamdump".)
・I don't know how to logout
When you press the menu on the bottom left ,
you will see "Leave(終了)" at the bottom. Pressing this will bring up the logout menu.
Then, please use "Logout(ログアウト)".
・How to change from 日本語 to English in virtual PC
[設定] - [LXQt設定] - [地域]
Please change "地域(G):"
・Remote control
We can use "nomachine" from 2022.1.
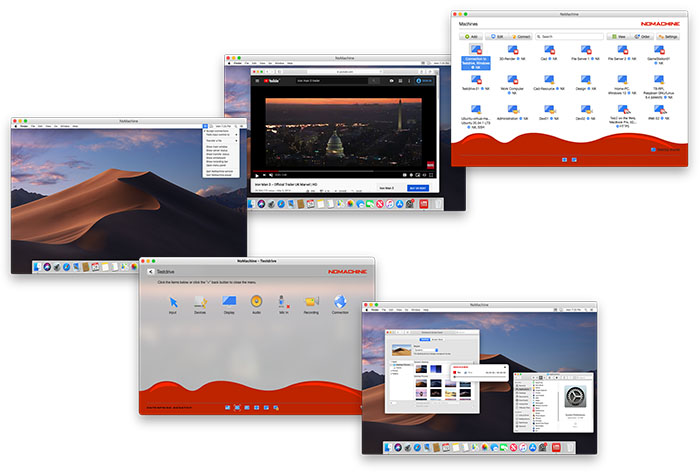
Click here to connect.
For remote operation, each user is authenticated using (ID+passwd).
You will then be able to see a list of PCs that each user has permission to remotely control.
Here, you can select the PC you want to remotely control and authenticate with your Linux account (ID+passwd).
Username of Windown PC at BL-3A and BL-4C are "USER".
・SPEC data is not updated on NextCloud
NextCloud will not transfer files unless it detects that the files have been updated.
Therefore, it is a good idea to explicitly update the file like cp ***.dat ****,
when one routine of experimental macros such as temperature dependence is finished.